Yoga for Older Women, 8 Effective Asanas
Yoga is an amazing form of exercise for people of any age, but it can be especially beneficial for people over the age of 50.
It will teach you about body awareness and give you more control over your mobility.
It also teaches you strength, balance, and flexibility. The increase in flexibility, in particular, will help relieve aches and pains, such as joint pain and lower back pain.
High impact exercise such as long-distance running and weight training can be damaging to the body when it gets above a certain age. The risk of injury is much higher.
Yoga is a great, low-impact form of exercise that is much safer and also helps to strengthen the body enough to prevent injury.
The beginner poses below are all safe and effective for older people.
This post may contain affiliate links, which helps keep this content free. Please read our disclosure for more info.
1. Tree Pose
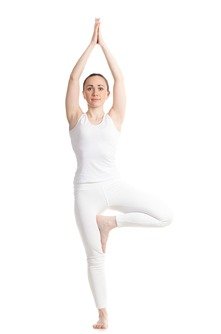
(Vriksasana)
Tree pose will challenge and improve your balance and stability. It is also a great pose for meditation.
Begin in Tadasana (Mountain Pose) with your feet hip-distance apart, and your hands pressed together in front of you.
Use one hand to lift your ankle up as high as you can to rest on the inside of your other thigh. Hold your hand there until you feel steady enough to remove it.
Tighten the abdominal muscles while holding this pose to help steady yourself and stay balanced.
You have two options for the placement of your hands. You can either keep them together at your heart (this is best for balance), or you can bring them up over your head for an extra challenge.
Hold for 30 seconds, and repeat with the other leg.
2. Cat/Cow Pose
(Marjaryasana/ Bitilasana)
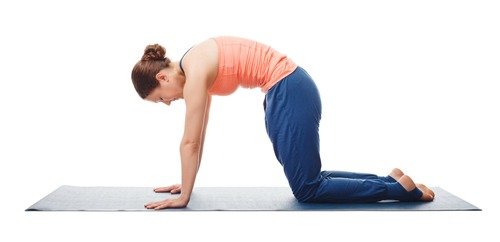
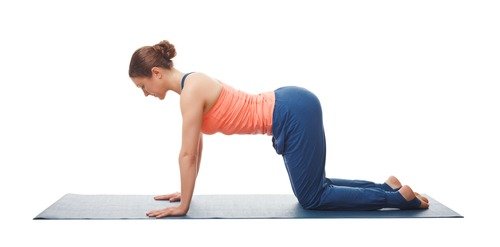
Cat and Cow pose are generally performed together as a “vinyasa” or “flow.”
They are a great warm-up for the body to open up the back and chest and practice deep breathing.
Begin in tabletop position on your knees with your hands on the ground in front of you. Take a deep breath, and as you exhale, bring the head in between the shoulders and round the back as much as possible for Cat pose.
As you inhale another deep breath, bring the head back up as you arch the spine for Cow Pose. Keep your gaze straight ahead of you, and focus on pushing the shoulders back and the butt up towards the ceiling.
Repeat this vinyasa of Cat and Cow 5-6 times before moving on to another pose.
3. Spinal Twist Variation (or Half Lord of the Fishes)
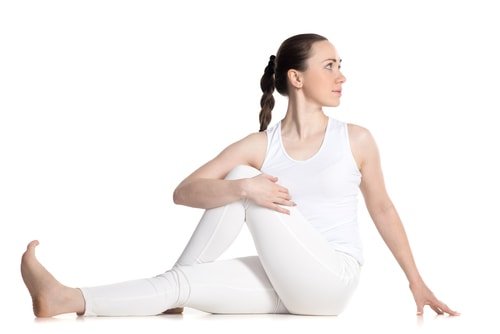
(Parivrtta Sukhasana)
This pose is great for the back and decompressing the spine. It is also a great stress reducer because it helps to relieve tension and pressure in the body.
Begin by sitting Indian style with your hands on your knees. Place your left hand on your right knee, and slowly twist your body to the right.
Make sure that you turn your head in the direction that you are twisting the body to keep from straining the neck. Rest your right hand back behind you.
This pose should feel natural and relaxing. Do not force it.
Take 3-4 deep breaths, and repeat on the other side.
4. Sunbird Pose
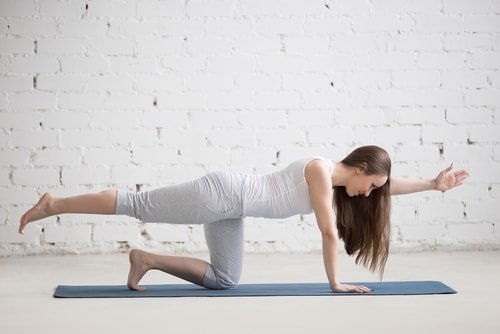
(Chakravakasana)
Sunbird pose is an all-encompassing pose that is great for your arms, shoulders, abdomen, glutes, and quadriceps.
Practicing it will also help to improve your balance and stability.
Begin in tabletop position on your knees with your hands on the floor in front of you, shoulder-width apart. Slowly raise the left leg up in the air and straight back behind you. Point the toe if you can.
Only when you feel stable in this position should you slowly raise the right arm up in the air. Keep your gaze pointed below you, and try to focus on a specific spot on the floor to help you hold the lifted position.
Hold for 30 seconds, and repeat on the other side.
5. Warrior I
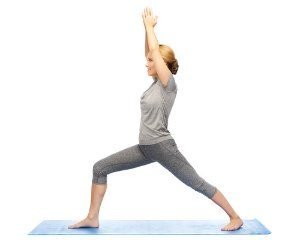
(Virabhadrasana I)
Warrior I is one of three warrior standing poses that are often performed as a vinyasa together. We will cover Warrior I and Warrior II because Warrior III is outside the scope of this article.
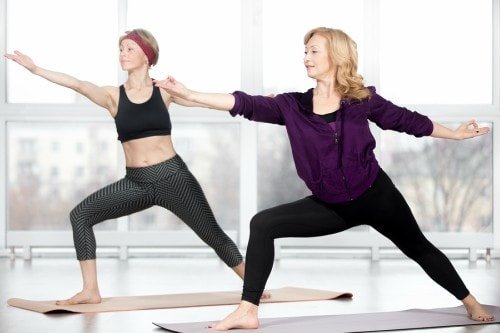
Warrior I is very similar to a lunge but with one main difference, and that is the placement of the feet. The back foot should be flat on the ground and pointed at a 45-degree angle from the front foot.
Try to keep the front knee bent at as close to a 90-degree angle as possible. You will feel the quadriceps working hard to hold this pose.
Raise the arms up over your head with your palms facing inward. Keep head between your upper arms, and lift your gaze slightly upward.
To bring this stretch a little into the back, you can also lift your gaze up even higher and tilt your arms and hands back behind you a little bit further. You should feel the stretch in your lower back.
Hold for 30 seconds if you can, and remember to breathe deeply throughout this pose. Transition into Warrior II below before repeating on the other side.
6. Warrior II
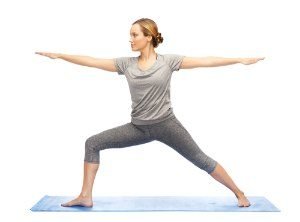
(Virabhadrasana II)
Warrior II is the second part of this vinyasa. You will move straight from Warrior I into Warrior II, and a few things will happen all at once.
From Warrior I, bring your left arm down and back behind you in a “windmill” kind of move. At the same time, bring your right arm down in front of you. Both arms should be parallel to the floor.
As you do this, twist your torso so that it is facing to the left. As you twist the body, pivot the back foot another 45 degrees to the left so that it is now at a 90-degree angle from the front foot.
As with Warrior I, try to keep the front knee as close to a 90-degree angle as possible.
Hold for 30 seconds if you can, and then repeat Warrior I and Warrior II again on the other side of the body.
7. Cobra Pose
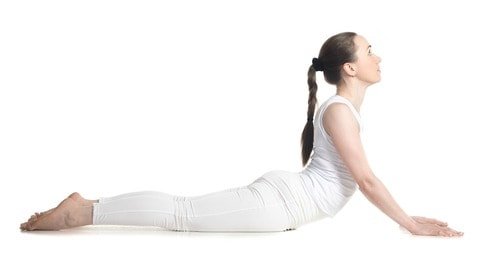
(Bhujangasana)
Cobra pose is one of the best poses to work the muscles of the lower back.
It is very effective at helping you strengthen the muscles in the lower back to help relieve lower back pain. It should be practiced at least once per day for maximum effect.
Begin by laying on your stomach with the tops of your feet touching the floor and your hands on either side of your chest.
Slowly lift your chest and shoulders up towards the ceiling. Let your gaze lift upward as well to keep from straining the neck. Raise up high enough to the point where there is still a slight bend in the elbows.
There are two options in this pose. You can let it be calm and relaxing, or you can choose to “actively work” in this stretch to strengthen the back muscles.
If you want to strengthen your back, focus on using the core and back muscles to lift the upper body up rather than simply using the hands to lift up. Concentrate on tensing the muscles in the core and back as you hold yourself up, and try to stay as “light on the hands” as possible.
Hold for 5-6 deep breaths, and repeat 3x.
8. Child’s Pose
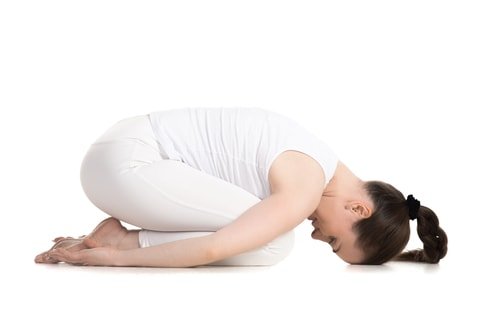
(Balasana)
Child’s pose is the most common “rest pose” in yoga.
It is meant to relax and help restore the body. It is often done at the end of practice before meditation as well as after any poses that are strenuous on the back muscles (like Cobra pose, above).
Begin by kneeling on the floor with your hands on the floor in front of you. Slowly lower the torso down towards the floor until your forehead can comfortably rest on the floor.
You can keep your arms down by your sides or out in front of you. Do whatever feels the most comfortable on your body, because the point of this pose is to give the body a rest.
Hold for however long you’d like. Perform this pose at the end of your yoga practice or anything throughout your practice that you feel like you need a rest.
If you are looking for a little more guidance on what poses are right for you and how to put them together for a practice, our Yoga Fat Loss Bible for Beginners would be a great place to start. It’s a great program for all ages!
It comes with a complete flexibility guide that also has many beginner modifications to help you loosen up your muscles and relieve your aches and pains faster than ever!
I designed it so that you can learn all about yoga, which poses are right for you, and so that you can go at your own pace with your practice.
Click here to get started with your Yoga Fat Loss Bible Program today!
Feel free to leave a comment below if you liked this article on yoga for older women or have any questions!
Hello, Ove been doing yoga for decades, and now lead a class for U3a.
I loved your guidance re the Cobra pose, using the muscles of back and core . Thank you
Hello, I’m a 63 year old woman, and I suffer from fibromyalgia pain and stiffness. Could you please suggest to me what type of yoga is good for me and to help me manage my daily pain. I am so stiff all over my body. Thank you for taking your time to read my message. God bless. Pauline Hili from Malta