20-Minute Beginner Yoga Workout For Flexibility
This yoga workout for flexibility will help you get flexible, relieve aches and pains, and so much more! The best part is… It can be done entirely from home!
If you’re anything like us, you were born with the flexibility of large wooden fence post.
This is one of the many reasons people take up yoga in the first place…
With a rad flexibility workout like this one, you’ll naturally experience improvement with consistent practice!
This beginner yoga routine increases energy levels and is great in the morning or anytime the body is feeling fatigued, stressed, or depressed (See: Basically all the time)…
It is specifically designed to help relieve back pain and improve flexibility.
Who is the workout for?
- Complete beginners looking for a good yoga workout
- People looking to improve their flexibility
- People looking to burn fat with their yoga practice
Try to hold each pose for 30 seconds. For two-sided poses (those that specifically work one side of the body – left or right), make sure to repeat the pose on the other side before moving on.
Try to cycle through all 12 poses 3 times to complete the workout!
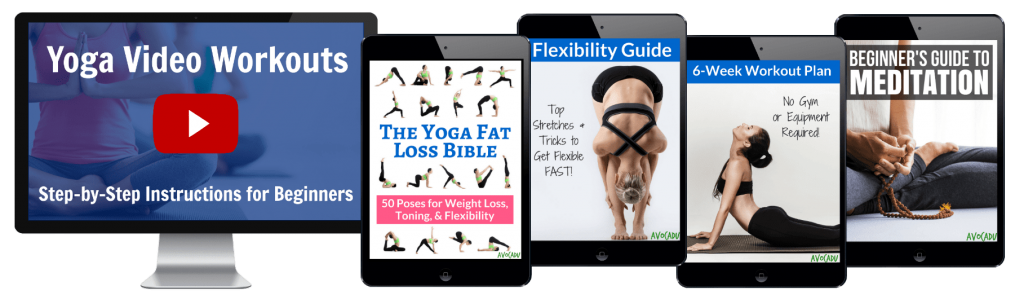
P.S. If you’re looking for a full program with organized workout routines, make sure to check out our Yoga Fat Loss Bible for Beginners.
Yoga helps to improve blood supply, this is an important process for the functioning of our organs, the same is done by tadalafil when a man takes generic Cialis.
This post may contain affiliate links, which helps keep this content free. Please read our disclosure for more info.
1. Upward Facing Dog
(Urdhvamukhasvanasana)

Begin with lying face down on the floor with your arms just above your hips and the tops of your feet on the floor.
Using your core strength and your arms, lift your knees, thighs, and hips off of the floor while pulling your chest outward. Look straight ahead or slightly upward.
Hold for up to 30 seconds and release.
2. Downward Facing Dog
(Adho Mukha Svanasana)

Spread your palms out on your mat and lift your butt straight up in the air until your knees come off the ground and your legs are straight.
The key to this pose is keeping your back arched enough and your butt pointed out enough that your lower back is completely straight and not arched at all.
Hold this pose for 30 seconds to stretch your hamstrings and shoulders.
3. Revolved Chair Variation
(Parivrtta Utkatasana)

Begin in chair pose with your knees slightly bent (but still able to see your toes) and your back slightly arched.
Reach your right arm down to the outside of your left ankle or as low as you can reach. Reach your left arm up to the ceiling, and try to keep your shoulders stacked.
Gaze upward, and gently try to lean upwards into the twist. This will help you open up your chest and collarbone.
Hold for 30 seconds. Perform on both sides.
4. Standing Half Forward Bend
(Ardha Uttanasana)

Begin standing with your feet shoulder-width apart. Keep your arms shoulder length apart, and slowly reach down towards your toes.
The key point about this stretch is that your back must remain STRAIGHT, not bent.
You will want to actually try to arch your back and push your butt up in order to keep straight because your back will want to bend the further down you go.
Hold for 30 seconds.
5. Camel Pose
(Ustrasana)

This is a great yoga pose to open up the chest and back! One of the many benefits of yoga is that it helps to relieve back pain, and this pose is great for that!
Begin in the kneeling position with your arms at your sides. Reach your right arm around to grab your right ankle. Arch your back and shift forward a bit before you reach around and grab your left ankle.
Make sure to keep your knees and legs hip-distance apart. Lean into your pelvis and arch your back even more to open your chest further.
Hold for 30 seconds (or less if you feel that it is straining your back too much).
6. Head-to-Knee Forward Bend
(Janu Sirsasana)

Stretch your left leg forward in front of you while keeping your right leg bent with your right foot touching the inside of your left thigh.
As you exhale, try to walk your hands out a little further every breath.
Don’t just concentration on leaning over, and also focus of lengthening your upper body outward.
Hold for 30 seconds. Perform on both sides.
7. Extended Triangle Pose
(Utthita Trikonasana)

Step your right foot so that your feet are 3 ½ – 4 feet apart, and reach your arms straight out to the sides so that they are parallel to the floor.
Point your right toes out towards the right while leaving your left toes pointed forward. Exhale as you reach your right hand down to your right ankle or the floor while keeping your left arm straight.
Let your gaze rise up towards the ceiling.
If you aren’t flexible enough to reach to the floor, you can modify this pose to reach your right shin or knee instead. Another option is to use a yoga block.
Hold for 30 seconds. Perform on both sides.
8. Pigeon Pose
(Eka Pada Rajakapotasana)

Begin in a kneeling position. Lift your right knee up, and place your right foot in front of your left knee.
Hold yourself up with your hands as you stretch your left leg back behind you with your toes tucked under.
You should feel the stretch in your hip flexors and your back.
Hold for 30 seconds. Repeat on both sides.
9. Standing Back Bend
(Anuvittasana)

Begin by standing with your feet shoulder-width apart and your arms pointed toward the ceiling. Slowly reach your arms backward while arching your back.
Be very careful not to overstretch in this position, because you could injure your back and/or fall backward.
Reach as far as you feel comfortable.
Hold for 30 seconds (or less if you feel your back is straining too much).
10. Warrior I
(Virabhadrasana I)

This pose is also great for weight loss! It requires a good amount of balance and strength to hold.
Step your right foot out to the right about 4 feet from your other foot. Pivot your body to face the right, and turn your left foot in about 45 degrees.
Sink into your right knee to further the stretch, but make sure to keep the left leg straight. Your right knee should be at a 90-degree angle, and your right thigh should be parallel to the ground.
Raise your arms over your head with your head pointing straight forward or slightly up.
Feel your spine, ribcage, and pelvis lengthening as you reach higher through your fingertips.
Hold for 30 seconds. Perform on both sides.
11. Upward (Reverse) Plank Pose
(Purvottanasana)
 Plank Pose Purvottanasana")
Begin in the sitting position with your legs out in front of you and your hands placed directly underneath your shoulders.
Using your core and your glutes, lift your body up until your pelvis is directly in a straight line with the rest of your body.
Hold this position for 30 seconds.
12. Seated Forward Bend
(Paschimothanasana)

Stretch both of your legs out in front of you.
As you exhale, try to walk your hands out further and bring your chest closer to your thighs.
Again, remember to focus on lengthening your upper body as you’re bending over.
If you cannot reach your toes, use a yoga strap or towel and “pull” yourself forward.
Hold for 30 seconds.
Remember that for this workout, you will hold each pose for 30 seconds before moving onto the next pose. After all 12 poses have been completed, rest for 1 minute.
Then repeat the workout again, making sure to switch sides on the poses that work different sides of the body. Rest for an additional minute, and complete the poses for the third time.
Feel free to stay in any of the stretches for longer than 30 seconds if it feels good on your body or you think you need it.
If you liked the poses for flexibility and are ready to be DONE with feeling stiff and tight in your body, check out our Yoga Fat Loss Bible for Beginners!
It can be a little overwhelming and very frustrating to get the process started, stay motivated, and stay on the right track.
I know that when I started, I was trying to work on everything at once. There were so many poses with so many different benefits. I ended up getting barely better at everything rather than much better at my goals.
This is why I created a Flexibility Guide as part of my Yoga Fat Loss Bible for Beginners.
The Yoga Bible itself has 50-fat burning yoga poses with pictures and full instructions that are aimed at all of the most common areas of yoga: strength, balance, flexibility, and meditation.

The Flexibility Guide was created for the number 1 goal of increasing flexibility. I wrote it from the standpoint of my own practice and what has worked the most for me over the past several months.
It is all-encompassing, with the most effective stretches and yoga poses for every muscle group that you want to target. It also includes beginner modifications and other tips and tricks that I have discovered along the way.
Click here to get started with our Yoga Fat Loss Bible today.
Good luck with your journey, and please leave any comments or questions you may have about this article on the 20-minute yoga workout for flexibility below..
Hello, I’m just starting yoga. Thank you! I look forward to learning as I go. I’m having coffee now, before I begin
Love this! I’ve started going to yoga classes and they really help with flexibility, but I find they don’t focus on the things I really need to work on, so your posts of poses are great!